
as per request, this is a tutorial for how to fade a pictures into one another in a gif like my header
Photoshop Knowledge 1-10 --1 being a beginner, 10 being a pro: 6 (you have to know a couple of photoshop buttons and icons; for example, frames, layers, animation window... etc)
P.S CLICK THE PICTURES TO ENLARGE AND SEE BETTER
Okay, let's begin!
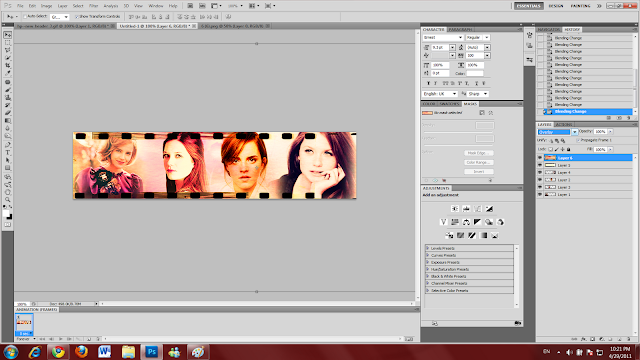
Step 1: First pick four (or more/less) pictures that you'd like to use in your header
I'm using two random Emma Watson photos and two from Bonnie Wright


Step 2: click CTRL-N and and set your width to whatever your theme supports and select a height that your theme supports. Remember that all themes are different! If you have a question on a specific theme, message me and I'll maybe know what to size it as!
for this example, my settings are 850px in width and 200px in height.
So, size and move your pictures where you want them to be
Step 3: now, we're going to move only part of our picture with a fading around it (called a feather) So click the button "M" on your keyboard or select the Marquee Tool on your tools bar.
(You can either use a circle marquee tool, or keep it a rectangle)
(no picture)
Step 4: click and drag your mouse and select an area of the picture you want on your header.
I just want her face, so this is what I wrapped my marquee on.


Step 5: click the button "V" on your keyboard or click the Move Tool on your tools bar. Now, click on the picture that you just selected (the rectangle should be blinking-ish) and drag it to your tab that you are doing your header it


Step 6: after you do that, do the same for all your pictures and resize them the way you want them to be shown in the header


Step 7: (optional, if you don't do this, see step 9.5) open your texture folder, should you have one, and pick a texture(s) that you want! If you do not have a texture folder however, and you like the one I picked (below) then I uploaded a different one for you to use (it's pretty similar, but not the same) you can save it here

I'm using these two textures. One is mainly for a background and design while the other one (on the left) is to add a little bit of colour


I'm using these two textures. One is mainly for a background and design while the other one (on the left) is to add a little bit of colour

Step 8: open your texture(s), drag it to your header tab, and resize it to your liking (make sure it covers all the pictures and it's the top layer)


Step 9: now (since we can't see our pictures) we're going to change the texture's blending. On the top part of the layers, you'll see a drop down menu that is always set to normal. Click the arrow and choose one that looks good with the picture, but that you can still see well on the graphic.
for this example, I picked "Darken" which you can see that it shows my texture, but my pictures too. FYI, darken may not work for you, so pick whatever looks best!


Step 9.5: if for some reason you do not want a texture, then make a new layer, drag it to the bottom, and find the Gradient Tool on your tools bar. Click, hold it, and drag it a little bit to the side. A small menu should appear and (still holding that mouse!) drag your mouse to the Paint Bucket Tool.
Then, you pick a colour on your colour pallet, and color the background (if you need pictures or any more help with this step, message me)


Step 10: if you have another texture you want to use, like I do, open that one, drag it to your header layer and size it to your liking. If you like the texture I'm using now and would like to use it, you can download a look-a-like here

Step 11: now change the texture's blending to set the picture nice. I'm setting mine to Overlay because it gives it a nice colour but still shows off the pictures nicely
Step 12: now, you're going to click the new layer then click the button "T" on your keyboard, or click the Type Tool on your tools bar

Step 11: now change the texture's blending to set the picture nice. I'm setting mine to Overlay because it gives it a nice colour but still shows off the pictures nicely

Step 12: now, you're going to click the new layer then click the button "T" on your keyboard, or click the Type Tool on your tools bar
Write what you want, resize it, pick your font, pick a colour, and place it anywhere you'd like on your header.

Step 13: alright, I can't see my text really, so I'm going to put a text shadow on my text. If you want to do that too, go to your text layer to the very corner of the layer, and double click that. A window should pop up called Layer Style. If this doesn't work for you, then right click on your text layer, and click Blending Options.
For this, I'm going to use a drop shadow so I can see my text a little but better.
Check the boxes that you want on your text and edit everything to your liking.


Step 14: Now that you have your words, click a new layer so you can type your URL. Type your URL, pick your font, pick a colour, and place it anywhere you'd like on your header.
Change the text opacity to your liking! Mine is set to 50% Opacity and 80% Fill

Step 15: Click the Window on your menu, and (if it's not already checked) check the Animation button

Step 16: now, you're going to make it into a gif! On the bottom of your animation window, click the drop down menu and then click "Make Frames Into Layers"

Step 16: Now, you're going to have tons of excess things, but ignore those for now. Let's focus on the first frame.

Step 17: click on your drop down menu again, and make sure that New Layers Visible in All Layers is not checked.

Step 18: Now, make sure you have the first frame selected. Okay, now check the eye icon on the layers that you want visible on your first frame!
For mine, I selected both my texts, and both my textures

Step 19: then click your second frame, and click the second picture that you want to appear

Step 20: now click the third frame and click the third picture that you want

Step 21: now click the forth frame and the forth picture you want

Step 22: you might have excess frames, so click the first excess frame, hold your shift key and click the last excess frame.

Step 23: now, click the Trash Icon on the bottom of the animation window to delete the frames.

Step 24: Now, we're going to gif this thing! Woo! Okay, so if you saw my fading gif tutorial, then you know what's coming next.
Click the first frame, and then click the tween tool on the bottom of your animation window

Step 25: when the Tween window pops up, write a number in where it says "Frames To Add" (usually a number 1-5)
for this example, I'm writing 2

Step 26: now, click the next frame where your second picture should be, and do the same thing with the Tween tool!

Step 27: click the third frame and do the same thing with the tween tool

Step 28: now click the last frame, and click the tween tool once again. This time, you're going to click the drop down menu and select "First Frame"

Step 29: now, click your very first frame, hold your shift key and click the very last frame to select all the frames

Step 30: on the last frame, click the little black arrow next to the seconds, and choose the Delay Time for all your gifs.
for my example, I'm using 0.2 seconds

Step 31: you're all done! Woo hoo! Now, click Ctrl-Alt-Shift-S or go to file > save for web & devices to save your new gif

Step 32: save it to a folder, write a name for it, then click okay

Step 33: upload it to your tumblr theme and it should work just fine! If you have any trouble with any of the steps, message me and I'll help as much as I can!
My finished header looks like this:

The End!
hope this helped! If there are any questions about this or if you would like to request any more tutorials, message me in my ask box